The knowledgebase is a categorized collection of answers to frequently asked questions (FAQ) and articles. You can read articles in this category or select a subcategory that you are interested in.
PixFuture First-Party Data Solution
Solution
PixFuture First-Party Data Solution
Overview
PixFuture First-Party Data Solution is the secured identity solution, that is targeted to boost the quality of connections with each authenticated consumer. Access premium demand from a list of our Demand Partners and maximize your earnings by letting us share hashed first-party data about your audience. Solution use various ways of well-known techniques to assure the security of data to be passed.
Integration Options
|
Option |
Requirements |
|
· Hosting with PHP 5 or greater · Ability to save the script in your website directory · Access to First-Party Data via PHP · Knowledge how to retrieve First-Party data |
|
|
· Access to First-Party Data via JS · Knowledge how to retrieve First-Party data |
|
|
· WordPress installed |
|
|
· Joomla installed |
*Server-Side integration illuminates any data leaks but makes integration more complex.
Server-Side (PHP) Integration
1. Insert PHP script to your website web directory and name your script with .php extension.
Ex.: pixfuture.php
2. Modify the beginning of the script with consumer data you can retrieve. Ex. If your data about the publisher is collected in Session, then you could get an email using $_SESSION["user_email"]. If you do not have some of the data leave it as an empty string
$email = {{USER_EMAIL}}; // Fill in with dynamic value or leave it empty. Example example@example.com
$phone = {{USER_PHONE_NUMBER}}; // Fill in with dynamic value or leave it empty. Example 1234567890
// Gender, where “M” = male, “F” = female, “O” = known to be other
$gender = {{USER_GENDER}}; // Fill in with dynamic value or leave it empty. Example M
// Year of birth as a 4-digit integer.
$age = {{USER_AGE}}; // Fill in with dynamic value or leave it empty. Example 1996
3. Call the saved script file from the directory you saved at the head of your website.
<head>
<!--Between HEAD tags-->
<script src="https://your_website_domain/directory_path_you_saved_script/pixfuture.php"></script>
<!--Between HEAD tags-->
</head>
Client-Side (JS)
1. Place this JS script below between HEAD tags on all pages you serve tags with PixFuture
<script src="https://cdn.pixfuture.com/crypto-js.min.js"></script>
<script type="text/javascript">
let _email = {{USER_EMAIL}}; // Fill in with dynamic value or leave it empty. Example example@example.com
let _phone = {{USER_PHONE_NUMBER}}; // Fill in with dynamic value or leave it empty. Example 1234567890
let _gender = {{USER_GENDER}}; // Fill in with dynamic value or leave it empty. Example M
let _age = {{USER_AGE}}; // Fill in with dynamic value or leave it empty. Example 1996
var _pixHashes={pixHashes:!0};""!=_email&&(_pixHashes.email={md5:CryptoJS.MD5(_email).toString(),sha1:CryptoJS.SHA1(_email).toString(),sha256:CryptoJS.SHA256(_email).toString()}),""!=_phone&&(_pixHashes.phone={md5:CryptoJS.MD5(_phone).toString(),sha1:CryptoJS.SHA1(_phone).toString(),sha256:CryptoJS.SHA256(_phone).toString()}),""!=_gender&&(_pixHashes.gender={md5:CryptoJS.MD5(_gender).toString(),sha1:CryptoJS.SHA1(_gender).toString(),sha256:CryptoJS.SHA256(_gender).toString(),plain:_gender}),""!=_age&&(_pixHashes.age={md5:CryptoJS.MD5(_age).toString(),sha1:CryptoJS.SHA1(_age).toString(),sha256:CryptoJS.SHA256(_age).toString(),plain:_age});function handlePixMessage(b){(null!=b.origin.match(/served-by.pixfuture.com/g)||null!=b.origin.match(/.googlesyndication.com/g))&&b.source.postMessage(JSON.stringify(_pixHashes),b.origin)}window.addEventListener("message",handlePixMessage,!1);
</script>
2. Modify the beginning of the script with consumer data you can retrieve. Ex. If your data about the publisher is collected in Session, then you could get an email using sessionStorage.getItem("user_email"). If you do not have some of the data leave it as an empty string.
let _email = {{USER_EMAIL}}; // Fill in with dynamic value or leave it empty. Example example@example.com
let _phone = {{USER_PHONE_NUMBER}}; // Fill in with dynamic value or leave it empty. Example 1234567890
let _gender = {{USER_GENDER}}; // Fill in with dynamic value or leave it empty. Example M
let _age = {{USER_AGE}}; // Fill in with dynamic value or leave it empty. Example 1996
WordPress Plugin Integration
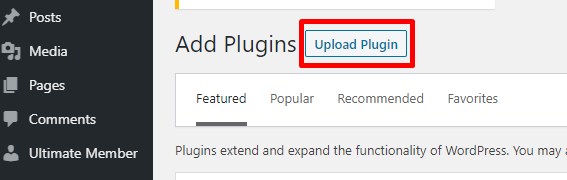
1. Login to your WordPress dashboard and navigate to Plugins -> Add New

2. Download the .zip file of the plugin from here
3. Press the Upload Plugin button at the top of the page
4. Choose to Upload the File that you download at step 2
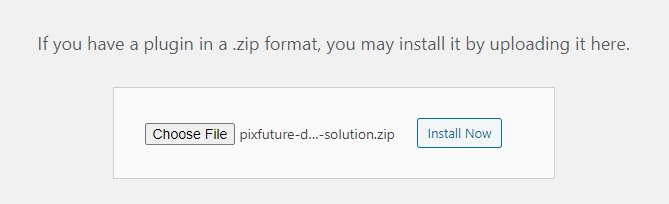
5. Press Install Now
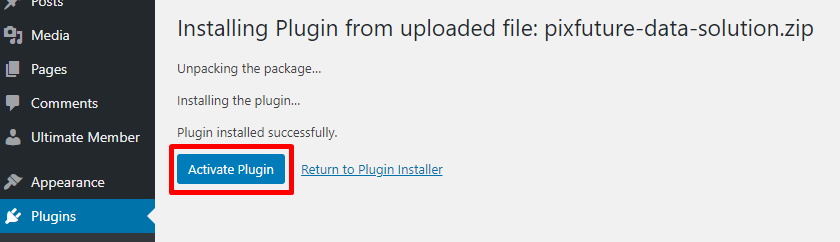
6. Once the installation is finished, press Activate Plugin
Joomla Module Integration
1. Download the .zip file of the module from here
2. Login to your Joomla dashboard and navigate to Extensions -> Manage -> Install
3. Switch to 'Upload Package File'
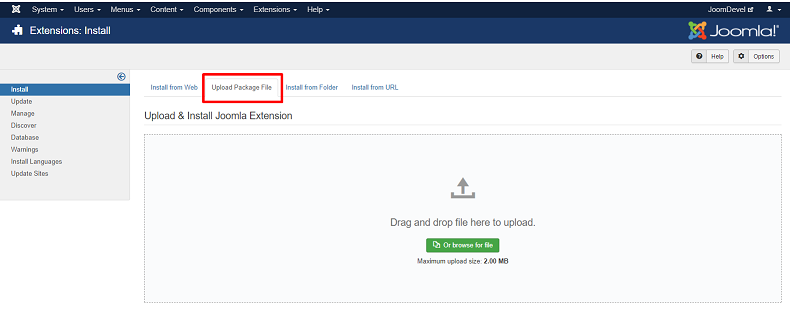
4. Choose to Upload or Drag and Drop the File that you download at step 1
5. You will see success message

5. Navigate to Extensions -> Modules
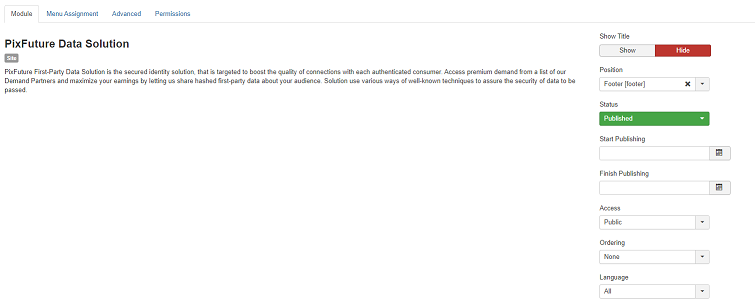
6. Find 'PixFuture Data Solution' in the list and click it
7. Changes to do:
- Status to "Published"
- Show Titile to "Hide"
- Chose one of the active positions or footer
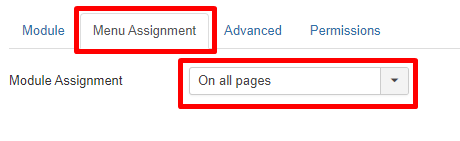
7. Switch 'Menu Assignment' tab and choose Module Assignment to 'On all pages'
8. Click 'Save & Close' button
Article details
Article ID: 61
Category: Publishers